SuperEx Guide: How to grant external permissions for Super Wallet
#SuperEx #SuperWallet
Yesterday’s article gave a detailed breakdown of the strengths of SuperEx’s Web3 wallet — Super Wallet — with a special focus on its external authorization function, which gives users a more flexible and secure way to manage their assets. Let’s take a moment to recap.
Super Wallet’s external authorization feature allows users to delegate partial operation permissions to other entities or individuals, enabling them to carry out specific actions on the user’s behalf — such as transferring assets, signing messages, or managing tokens. Users can choose who to authorize, what permissions to grant, and how far the access goes, thereby realizing diversified and convenient asset management.
For users, the introduction of external authorization brings a number of real, practical benefits:
- Easy and convenient asset management: External authorization lets users assign specific permissions to trusted parties. This means users can manage their digital assets effortlessly and get rid of tedious steps and procedures.
- Enhanced security and risk control: External authorization lowers the risks of private key leaks and misuse. With this function, users only need to approve and sign when managing digital assets such as deposits and payments — no need to expose the key itself.
- Business collaboration made easier: External authorization is particularly valuable in business partnerships. In future updates, Super Wallet will support granting specific permissions to business partners for quicker fund movements or contract signing. This helps streamline workflows and makes business cooperation more efficient and seamless.
- Secure multi-signature collaboration: In collaborative multi-signature settings, external authorization supports multiple authorized signatures to ensure the safety and legitimacy of every transaction. This is critical for joint decision-making and fund management, ensuring the trustworthiness and security of all operations.
Today, let’s walk through how to actually use Super Wallet for external authorization.
The “Super Wallet External Authorization User Guide” includes two sections: “Wallet Login” and “Wallet Authorization”.
Wallet Login:
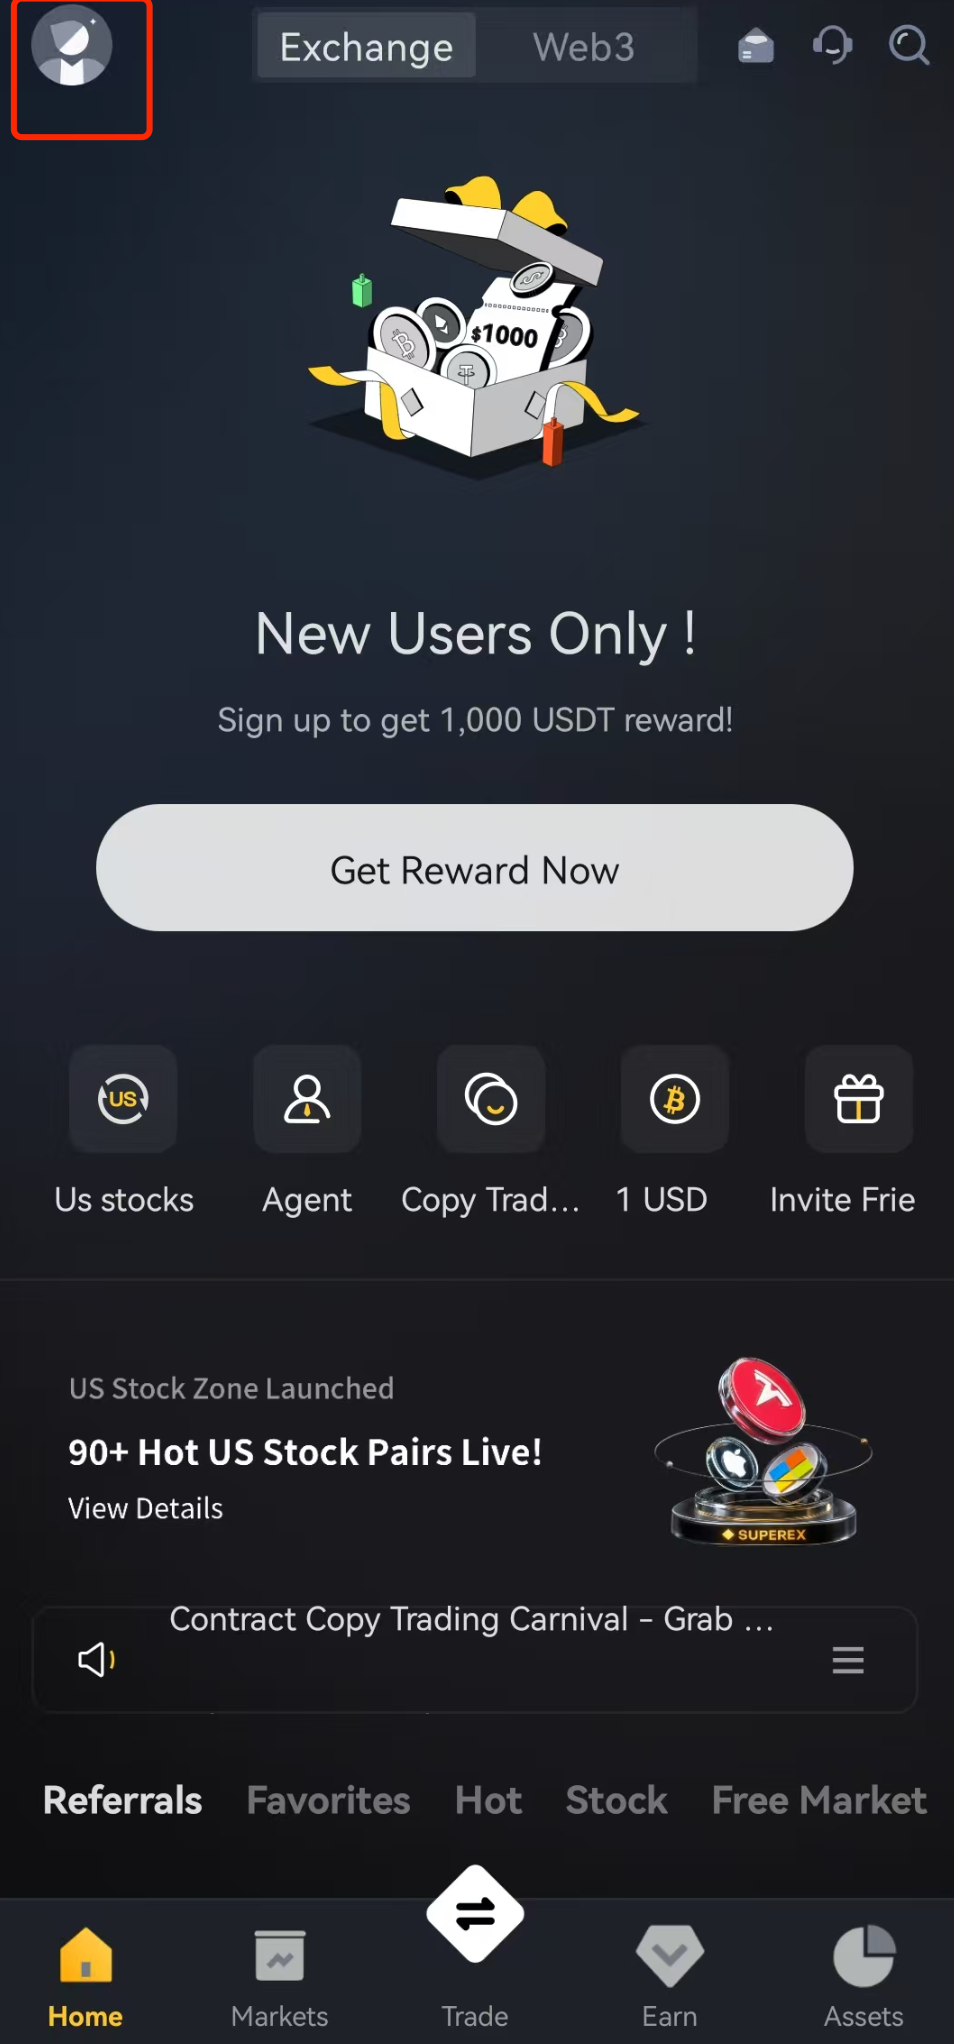
Step 1: On the login method, choose “Wallet Login”.
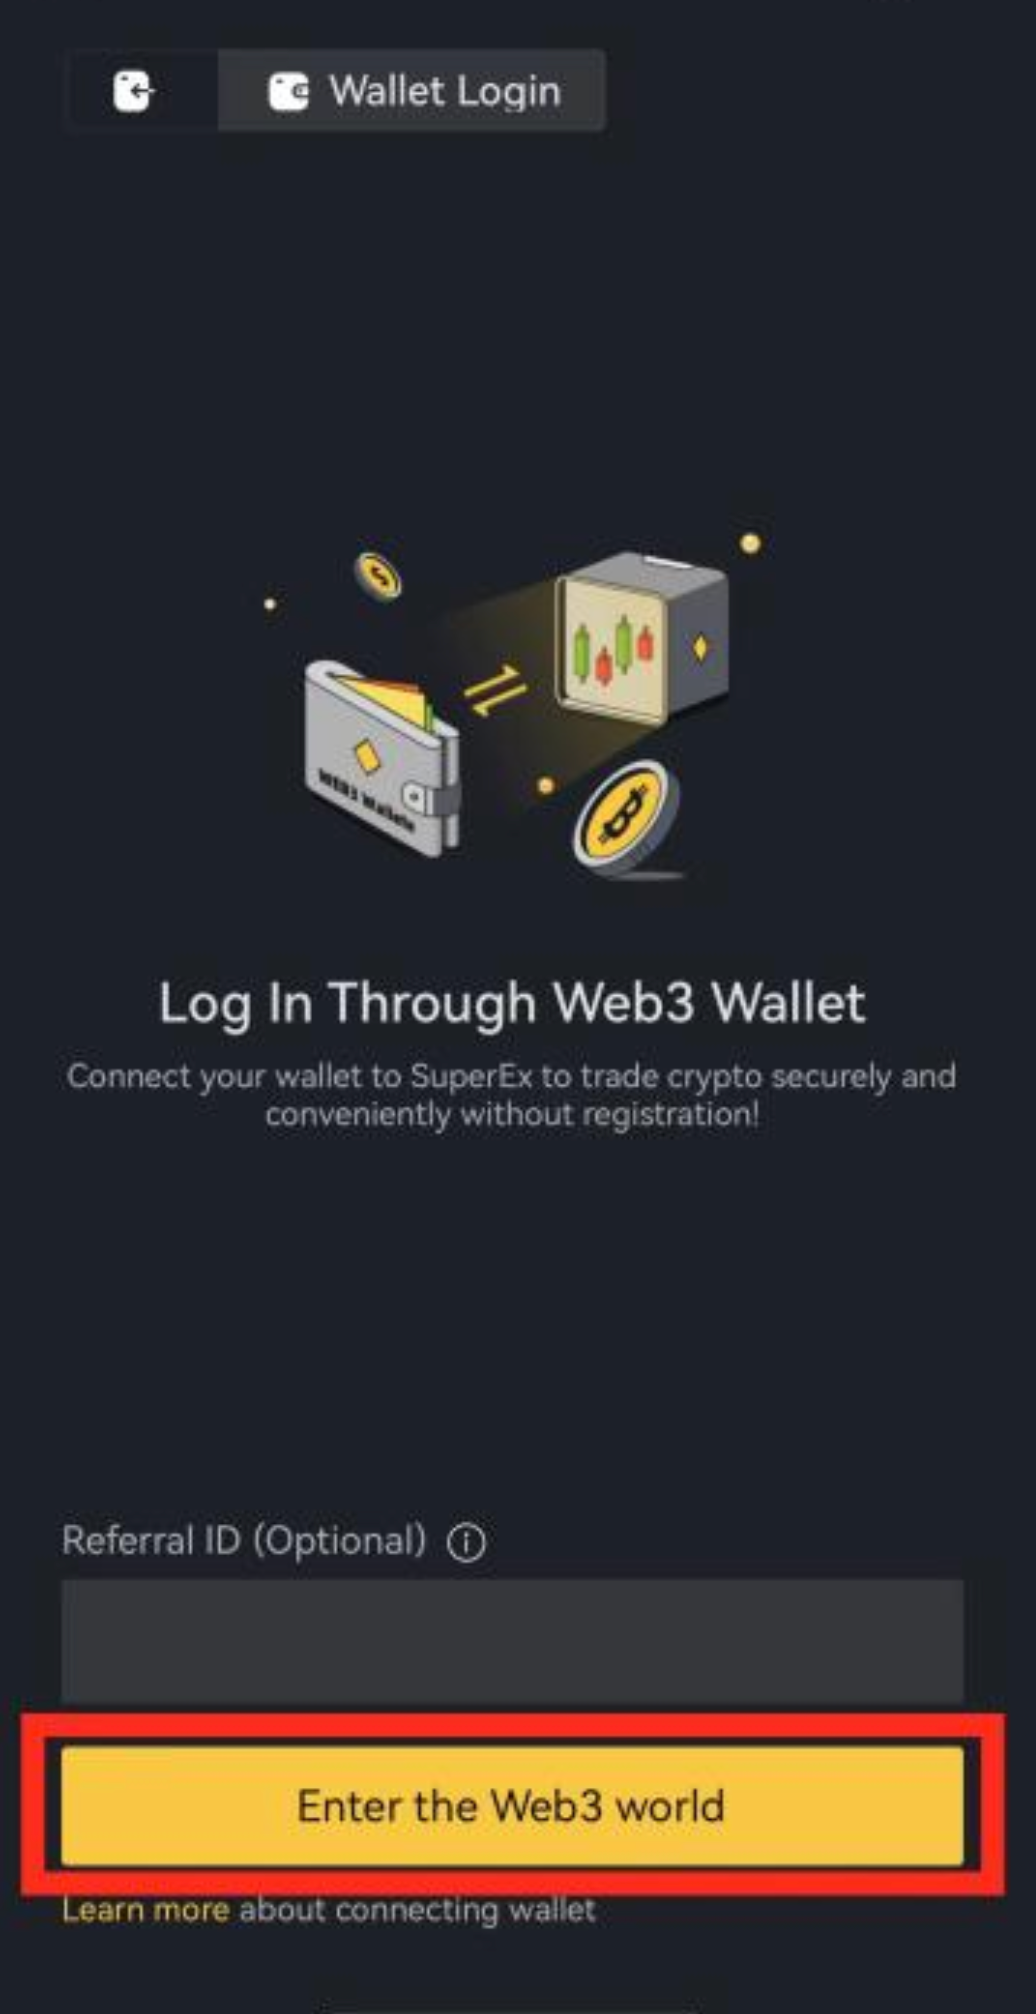
On the login page, select “Web3 Wallet Login”. As shown in picture 1:

Step 2: Choose your HD Wallet or the cryptocurrency network you need.
Currently, two networks are supported: “ERC-20” and “BEP-20”. As shown in picture 2:

Step 3: Select the HD Wallet you want to connect to.
There are two connection methods available: “Mobile Wallet” and “QR Code Scan”. Currently supported wallets are: Super Wallet, BitKeep, imToken, Metaask, TokenPocket, and Trust Wallet.
3.1 If the HD Wallet app and the SuperEx app are on the same phone, directly choose “Mobile Wallet” and select the HD Wallet you wish to connect from the available six wallets. As shown in picture 3:

3.2 If the HD Wallet and the SuperEx app are not on the same phone, select the “QR Code” connection method. Use the HD Wallet’s scanning feature to scan the displayed QR code for login. As shown in picture 4:

Step 4: When the page displays “Connection request has been approved”, it means the wallet connection is successful, and you can proceed to the next step “Wallet Authorization”. As shown in picture 5:

Wallet Authorization
Step 5: Click on “Signature Request” to access the wallet authorization page.
After verifying the authorization details, click “Authorize”. As shown in Picture 6:

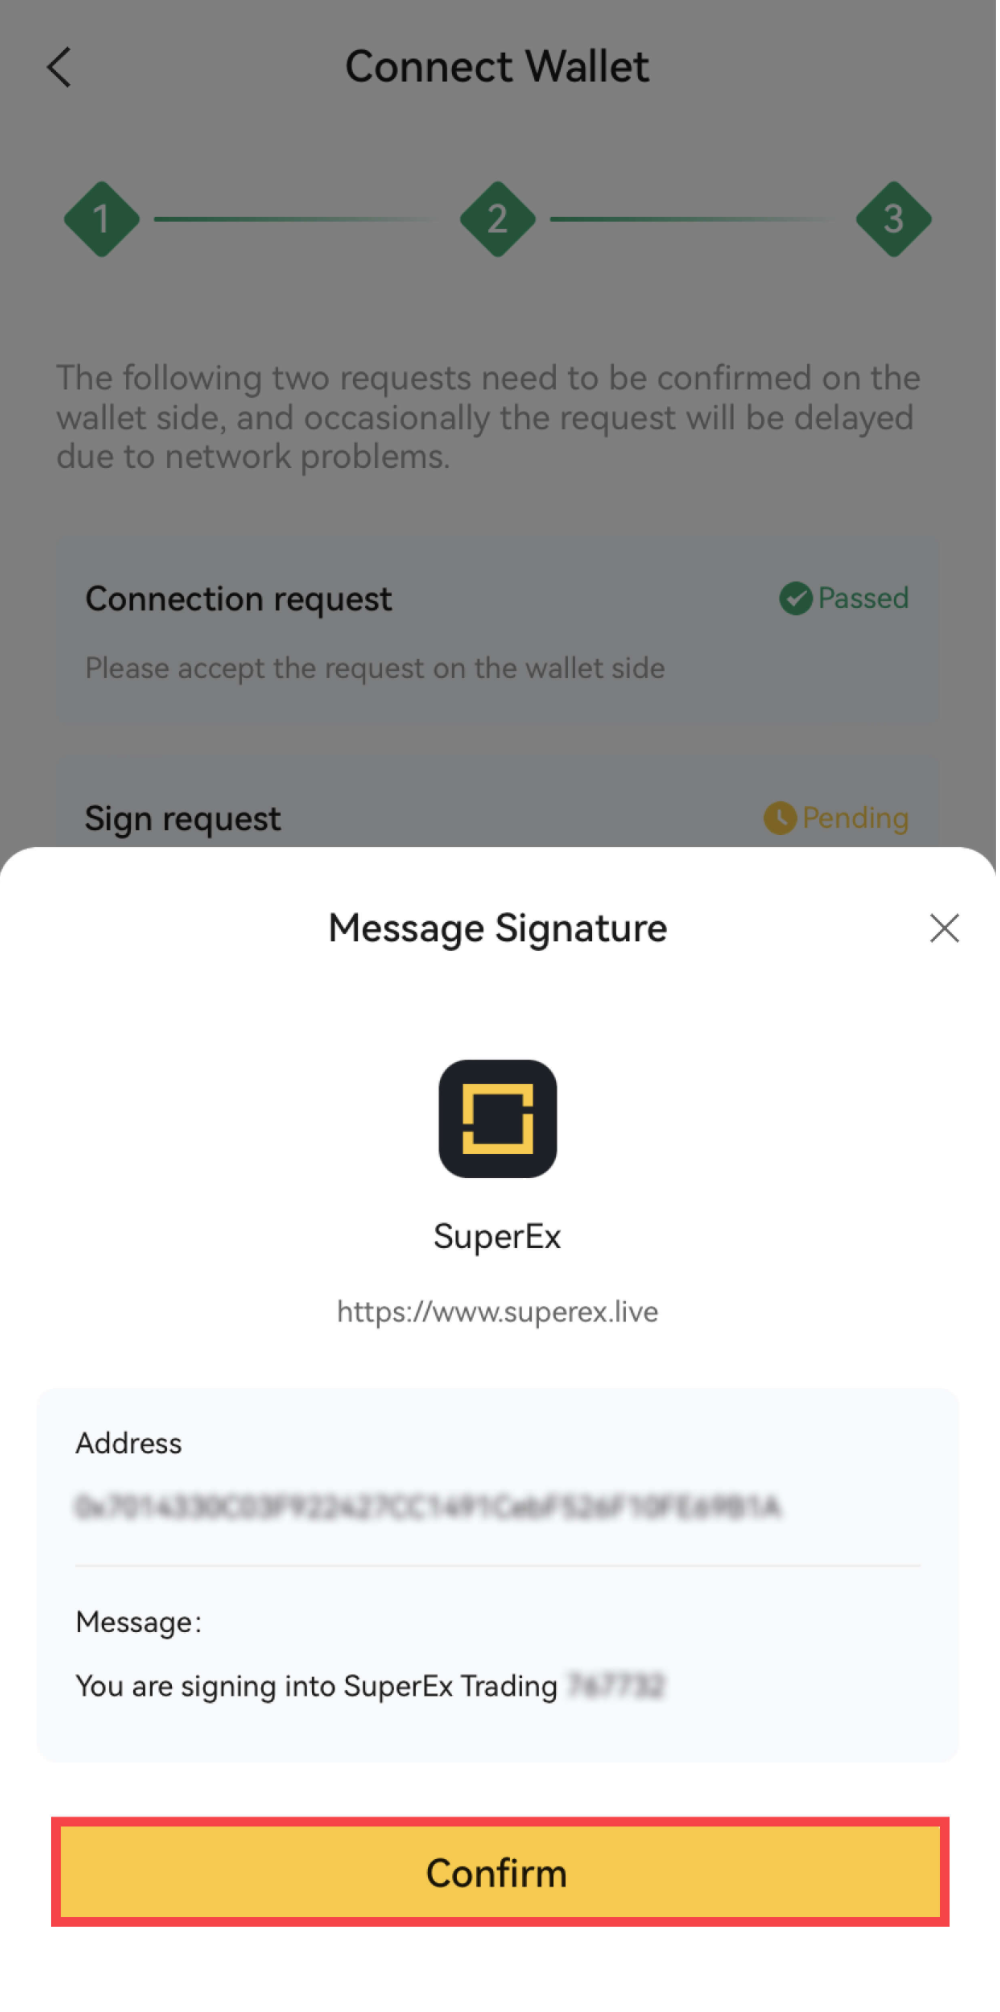
Step 6: In the pop-up Signing window, click “Confirm” to complete the authorization.
As shown in Picture 7:


Responses